2Printer is a print workflow automation solution that operates via a command line interface. Whether you use Command Prompt, PowerShell, or a scripting language interpreter, 2Printer functions in the same way.
- How to start batch printing quickly
- Сommand line structure
- Switches
- Print options (-props)
- Common options (-options)
- Service page options (-spops)
- Multiple pages per sheet options (-multipps)
- Post-print action (-postproc)
- File loading settings (-fls)
- Statistics (-stat)
- Operations (-oper)
- Command lines (-cmdlines)
- 2Printer Default Settings
How to start batch printing quickly
- Open the Windows Command Prompt. Start the Run application by pressing Win + R combination on your keyboard, and type in "cmd.exe" and press Enter:
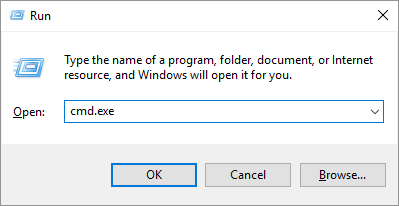
Command Prompt can be used to execute entered commands. You can use another command-line interpreter that's comfortable for you.
- Add switches and parameters to the command. In general, the basic syntax is as follows:
2printer.exe -src "C:\In\*.*" -prn "Xerox 2050"
- -src stands for a source for files. It can be a path to a folder, to a file, a list (a .txt with file paths), an Excel file, or a URL.
Type of source Example Folder path -src "C:\In\*.*" Path to a file -src "C:\In\Document.docx" Path to a list of file destinations -src "@C:\Files\list.txt" Path to FLIST file (.flist) -src "@C:\Files\My file list.flist" Web address (URL) -src "https://www.website.com" Path to an Excel file (XLS, XLSX, or CSV) -src "@C:\In\List.csv" - *.* stands for any filename – point – any file extension. It should be added after the folder path so that 2Printer can take all files from there. Asterisk (star, *) is a wildcard character which stands for any string of characters (or no characters at all);
- -prn should be followed by a printer's name. For example: -prn "Xerox 2050".
- When setting the source folder path (or source file path) and printer's name – don't forget to enclose them in double quotation marks. Example: -src "C:\In\Invoice.docx" -prn "Canon MFP";
- When using a web address (URL) as a source, you can add user and password if they are required to access the website.
- -src stands for a source for files. It can be a path to a folder, to a file, a list (a .txt with file paths), an Excel file, or a URL.
- Press Enter to execute the command. All files from the source (-src) will be printed on the selected printer.
Сommand line structure
The basic command line structure consists of switches, parameters, and values. 2Printer command line structure looks like this:
2Printer -<switch1> [param1:value paramN:value] -<switchN> [parameters]
To see a prompt with a list of available features, type in 2Printer.exe and press Enter:
2Printer.exe

Switches
Use switches to select the source for files, printer, print options, post-processing, operations, and more. You can enter several parameters (parameter:value) within a single switch, separated by space.
| Switch | Description |
|---|---|
| -src | Source for files. A source can be:
|
| -prn | Printer name. When entering commands, input printer name within double quotation marks. You can check the exact name of a printer in advance. |
| -props | Print options. Set up print-related options, such as the number of copies, page range, and more. |
| -options | Common options. Define various options, such as scanning subfolders, sorting files, silent printing, and more. |
| -spops | Service page options. Add a cover page which is a blank sheet of paper or a pre-defined cover page template to separate printed files. |
| -multipps | Multiple pages per sheet. Arrange several pages of a multipage document on one paper sheet before printing. |
| -postproc | Post-processing action. Copy, move, or delete files automatically after processing, if necessary. Can apply both to successfully printed and failed files. |
| -fls | File loading settings. This section includes settings that control pre-processing, specifically what the program does with the source files before converting them. For example, setting page size for HTML files in advance. |
| -stat | Report and statistics parameters. Creates a report in XML format with printing statistics in a separate file folder, such as the types of printed documents and the number of printed pages. |
| -oper | Operations. Perform an operation with each file, such as watermarking, resizing, cropping, or rotation. |
| -about | Information about the program. Shows license key and software version. |
| -cmdlines |
Command line. Allows you to run the 2Printer command from a TXT file. Example: 2Printer.exe -cmdlines "C:\Scripts\2Printer command.txt" |
Command line examples:
2printer.exe -src "C:\In\*.*" -prn "Xerox 2050"
2printer.exe -src "C:\In\File.docx" -prn "Xerox 2050"
2printer.exe -src "C:\In\*.*" -prn "Xerox 2050" -props copies:5 color:grayscale
2printer.exe -src "@C:\Files\list.txt" -prn "Xerox 2050" -options silent:yes -props spjob:yes
2printer.exe -src "C:\In\*.*" -prn "Xerox 2050" -postproc passed:move passed_dir:"C:\Done"
2printer.exe -about
Print options (-props)
You can control various print-related parameters using the -props switch.
copies: Set the number of document copies [+][-]
Default value: 1
Example:
2printer.exe -src "C:\In\*.*" -prn "MFP LaserJet" -props copies:3
duplex: Set duplex mode (double-sided printing) [+][-]
Values:
default (default value), simplex, vertical, horizontal
Double-sided (duplex) printing allows you to print on both sides of paper sheets. If your printer supports duplex printing – this might be a useful feature. By default, 2Printer uses the same duplex mode settings as those defined in your printer preferences. In 2Printer, you can set up vertical or horizontal duplex printing for your documents.
| Parameter and value | Effect |
|---|---|
| duplex:vertical | Prints documents double-sided using long-edge binding mode. |
| duplex:horizontal | Prints documents double-sided using short-edge binding mode. |
You can switch to simplex mode (one-sided printing) by using the duplex:simplex value. Or set duplex:default – to use printer preferences.
Example:
color: Select color or grayscale mode [+][-]
Values:
asinprinter (default value), color, grayscale, asindocument
Prints all documents in grayscale or color mode.
For instance, you can set -props color:asindocument to print pages in their original color. The program will choose either color or grayscale (black-and-white) mode for each page – depending on their contents. The actual printing will be based on the page's color or absence of color. If at least one pixel of the original file has color, the whole page will be considered as colored and thus printed in color.
Learn how to set color mode by default in Advanced Settings →
Examples:
orient: Set page orientation [+][-]
Values:
portrait, landscape, asindocument (default value), asinprinter
The default page orientation value is as set in the document. To print all documents in portrait or landscape orientation, use these commands:
Portrait orientation:
Landscape orientation:
Here you can also select other options:
- orient:asindocument – use the original document's page orientation;
- orient:asinprinter – use the same settings for orientation as in printer.
revpo: Select page order [+][-]
Values:
direct (default value), reverse
Switches to direct or reverse page order. You can change the pages' printing order to reverse when printing multipage documents.
Example:
papersize: Select paper size by ID number [+][-]
Unique values:
"-1" – As in printer (paper size as set in your printer's printing preferences).
"-2" – Page size based. When Page size based is selected, the program identifies the page size dimensions of a document. It chooses the best paper format that would match the page at a scale of 1:1 without large margins around the page. If a perfect match is not possible, then the closest possible option is used.
You can also use a specific paper size. Use this command to check the ID number of all available paper sizes.
Example:
pages: Set page range [+][-]
Default value: all
Defines numbers of pages to be printed.
To select pages from the end of the document, use the expression "last" (last for the last page, last1 for the penultimate page, etc.). For example: 1,5,last2,last1,last
Example:
scale: Select page scaling mode [+][-]
Values:
shrink (default value), fit, original, fill, booklet, zoom
Example:
| Shrink | Shrink-to-page option: decreases page size to printable area. It resizes only large pages to fit the paper and prints small pages in the original size. |
| Fit | Fit-to-page option: fits page size to printable area. Scales small pages up and shrinks large pages down to fit the paper. |
| Original | "Original" option: prints pages or images in their original size. |
| Fill | Fill-to-page option: print a full page from edge to edge on the short side. No matter the size, the page will fill the whole sheet of paper or even beyond the paper (on the long side). |
| Zoom | Set a specific scaling (e.g., 50% or 110%) in relation to the printable area. |
zoom_percent: Set zoom level in percents [+][-]
Default value: 100
Example:
tray: Select printer tray [+][-]
Default value: as set in printer preferences
Uses a specific printer tray. Enter tray name or ID to use a specific printer tray. You can view a list of available trays in advance.
Example:
pssp: Set paper source for selected pages [+][-]
Default value: none
Sets a certain printer tray for selected pages. That means you can select different paper sources for specific page ranges.
Example:
attachments: Set the processing of file attachments [+][-]
Values:
ignore, after (default value), before, only
If you print documents that contain attachments, you can select a way how 2Printer should handle them:
- ignore – ignore attachments
- after – print attachment after a document
- before – print attachment before a document
- only – print attachments only
This can be useful when batch printing, e.g., correspondence with email attachments, PDF Portfolio files, and other files with attachments.
Example:
spjob: Enable Single print job mode [+][-]
Values:
no (default value), yes
To ensure that files are printed in order, use the Single print job mode. This mode prints the files as a single batch, maintaining the specified order. The files will be sent to the printer from top to bottom as they appear in your list, whether it’s a text file or a list within a folder.
2Printer.exe -src "@C:\Input\docs.txt" -prn "MFP LaserJet" -props spjob:yes
Learn more about Single print job mode on Print Conductor website →
spjob_name: Enter a filename for the single print job [+][-]
Default value: "2Printer's single print job"
You can define the single print job's name:
The name appears in the print queue (spooler) on the computer and on the printer display. It may be convenient to see what's being printed. And it's easy to identify which job is having issues in case of an error.
Besides, if you're printing to a virtual printer, the name of the output file(s) usually matches the print job's name.
Besides plain text, you may want to use macros here. For example:
hor_align: Set horizontal alignment: left, center, right [+][-]
Values:
left, center (default value), right
Aligns the prints' position in the center, or left/right side of a sheet. Can be combined with other alignment and offset parameters.
Example:
ver_align: Set vertical alignment: top, center, bottom [+][-]
Values:
top, center (default value), bottom
Aligns the prints' position vertically in the top, center, or bottom of a sheet. Can be combined with other alignment and offset parameters.
Example:
hor_offset: Set horizontal offset [+][-]
Default value: 0
Shifts the prints' position horizontally by setting a specific value, in points (1/100 inch). Can be combined with other alignment and offset parameters.
Example:
ver_offset: Set vertical offset [+][-]
Default value: 0
Shifts the prints' position vertically by setting a specific value, in points (1/100 inch). Can be combined with other alignment and offset parameters.
Example:
Command line examples:
Common options (-options)
Scanning subfolders, silent printing, printing without alerts, and other options are controlled by the -options switch.
scansf: Scan subfolders [+][-]
Values:
no (default value), yes
Scans subdirectories and print files from them too (subfolder recursion).
Example:
srcpwd: Enter source file password(s) [+][-]
Allows printing of password-protected Word and PDF files. Enter a password in this format: srcpwd:password.
If a password contains spaces, input it between double quotation marks.
Example: srcpwd:"my password".
If you have files secured with more than one password, you can enter multiple passwords too.
Example: srcpwd:password1 srcpwd:password2 srcpwd:password3.
Example:
break_on_error: Break on error [+][-]
Values (value in bold is default):
no (default value), yes
Stops the program in case of an error.
Example:
unprinted_files_log: Create a log of files that failed to print [+][-]
You can keep a log of files that failed to print for some reason. You'll need to use -options unprinted_files_log and set a path to a file that should be created for the log file. Just specify a destination to a text file.
Example:
sort: Sort files by a specific parameter [+][-]
Values (value in bold is default):
unsorted, name, date, type, size, path, name_d, date_d, type_d, size_d, path_d
You can sort files by specific parameters, such as name, date, type, size, path. To sort the files in descending order, use values ending with _d (name_d, date_d, etc.).
runscript: Run a script before printing each document [+][-]
Runs a script (e.g., a BAT file) before printing the next file.
Example:
script_params: Add script parameters [+][-]
Adds parameters to the script (runscript), such as username or other parameters.
Example:
2Printer -src "C:\In\*.*" -prn "MFP LaserJet" -options -stat report_folder:"C:\Out" -options runscript:"C:\Data\Clear_printer_buffer.bat" script_params:"Username"
showprnlist: Show a list of printers [+][-]
Displays a list of all available printers and their names. When using other commands, input a printer's name exactly as you see in this list, within double quotation marks.
Execute command:

showprnlist2 Show a list of local or network printers [+][-]
Displays a list of available local or network printers. When using other commands, input a printer's name exactly as you see in this list, within double quotation marks.
Execute command:
2Printer.exe -options showprnlist2
showtraylist: Show a list of printer trays [+][-]
Displays a list of available printer trays. Can show trays of all devices or a selected printer only. When printing, you can use the ID number or name of a specific tray, for example: 2Printer.exe -src "C:\In\*.*" -prn iR C3025" -props tray:1.
To view all printers' names and trays sublist for each printer:

For instance, here's a command to print on a Multi-purpose Tray of a Canon printer (as on the screenshot above):
Note: When specifying a tray name, you can either use its name (-props tray:"Drawer 1") or its ID number, without quotation marks (-props tray:1).
showpapersizelist: Show a list of paper sizes [+][-]
Displays a list of all available paper sizes. To view paper sizes of a certain printer only, add -prn and the printer's name to the command:

For example, the following command prints all documents in a folder "C:\In" in Legal paper size format:
getprinterstatus: Check the status of a specific printer (online/offline) [+][-]
Sends a request to a specific printer and checks its status. The printer's status will be "online" if it's turned on and available, or "offline" if it's turned off or unavailable.

log: Create events log [+][-]
Values:
yes (default value), no
Saves log files (in XML format) containing information about the system and records of all 2Printer events. We recommend having this parameter activated because information contained in log files will help 2Printer developers quickly figure out what's happening in case of any error or issue.
logpath: Set path to log files location [+][-]
Default value: %TEMP%
Sets path to a folder for log files. By default, it is %TEMP% which usually opens the path "C:\Users\[User]\AppData\Local\Temp".
logverbosity: Set log verbosity [+][-]
Default value: verbose
Select the type of log created by 2Printer: Verbose, Regular, Laconic, or Trace.
2Printer.exe -src "C:\In\*.*" -prn "iR C3025" -options log:yes logpath:"E:\2Printer Logs" logverbosity:regular
pres: Create a plain TXT file listing all printed files [+][-]
Default value: none
Create a plain text summary showing which files were printed successfully and which ones failed.
2Printer.exe -src "C:\In\*.*" -prn "iR C3025" -options pres:"C:\My folder\My_log.txt"
export_path: Export current settings and recent logs as a ZIP archive [+][-]
Default value: none
Specify a path to export a ZIP file containing the current 2Printer settings ("2Printer.ini") and recent log files. This archive can be attached when contacting our support team to help diagnose issues.
2Printer.exe -src "C:\In\*.*" -prn "iR C3025" -options export_path:"C:\My folder\Logs and Settings"
silent: Suppress console output [+][-]
Values (value in bold is default):
no, yes
Prints all documents in fully automatic and silent mode. The information on console window will not be displayed during processing and no dialog windows will appear:
alerts: Display alert windows in case of an error or issue [+][-]
Values (value in bold is default):
no, yes
Displays alert windows in case of an error or issue. If set to "no", you will not get any dialog windows, such as asking to register the program's license or to print an additional cover page (if the trial version is used). However, the information on console window will be displayed during processing:
user: Enter username for printing files from the web [+][-]
Uses your username (login) if password entry is required to access the web page you want to print (URL is set as a source). Don't forget to specify both credentials – user and password.
password: Enter password for printing files from the web [+][-]
Uses your password if password entry is required to access the web page you want to print (URL is set as a source). Don't forget to specify both credentials – user and password.
Tip: Note: If your username or password contains spaces, try enclosing them in double quotation marks.
Command line examples:
Service page options (-spops)
The -spops switch allows you to print an additional cover page to easily separate printed documents, e.g., a blank sheet of paper. A cover page can help you easily distinguish between the printouts. You can use a built-in template or your own HTML file as a cover page.
cover: Print cover page [+][-]
Values:
no (default value), yes
Enables printing cover page between each file. Switch it to yes and specify the type of cover page using the template parameter.
Example:
template: Select cover page template [+][-]
Uses a built-in cover page template or a custom cover page in HTML format. To set a custom cover page, add a path to it starting with '@'.
Example command for built-in cover page template:
Example command for custom cover page:
Multiple pages per sheet options (-multipps)
Print more than one document/page on a sheet of paper using the -multipps switch. This way, you can fit two or more documents or pages on one sheet of paper.
enabled: Enable multiple pages per sheet mode [+][-]
Values:
no (default value), yes
Prints several pages of a multipage document on a single sheet of paper.
Example:
hor_pages: Horizontal pages on the sheet [+][-]
Default value: 1
Sets the number of pages to be placed horizontally.
Example:
ver_pages: Vertical pages on the sheet [+][-]
Default value: 1
Sets the number of pages to be placed vertically.
Example:
start_next_doc_on_new_sheet: Use the remaining empty space on the sheet of paper to start the next document, or begin arranging it on a new sheet of paper [+][-]
Default value: Yes
In Multiple pages per sheet mode, 2Printer starts printing each new document on a new sheet of paper by default.
If you want to print multiple documents (files) on a single sheet of paper without “page breaks”, disable this option Start next document on a new sheet of paper. The remaining empty space on the current sheet of paper (if any) will be used to start placing a new document (file). This will allow you to place several documents (files) on one sheet of paper and print them compactly.
Post-print actions (-postproc)
Use the -postproc switch to control what should be done with the files after processing: do nothing, move, copy, or delete. By default, there is no post-processing action selected for original files; therefore, all your files remain where they were before printing. If you want to move them somewhere, you can do it as you like.
passed: Select action for successfully printed files [+][-]
Values (value in bold is default):
none, copy, move, delete
Selects action to be performed with successfully printed files: do nothing, copy/move to another folder, or delete.
 files with post-print action")
Example:
passed_dir: Set path to destination folder for copy/move action [+][-]
Specifies a folder where successfully printed files should be moved or copied.
Example:
passed_name: Customize filename template for successfully printed files [+][-]
Values:
{*SrcFileName}.{*SrcFileExt}
Allows to adjust the filename for the source files that were successfully processed.
Learn more →
Example:
passed_delsf: Delete empty unused subfolders [+][-]
Values:
no (default value), yes
Deletes empty subfolders that are no longer needed after successfully printed files were moved or deleted from there.
Example:
failed: Select action for files that failed to print [+][-]
Values (value in bold is default):
none, copy, move, delete
Selects action to be performed with files that were not printed: do nothing, copy/move to another folder, or delete.
Example:
failed_dir: Select action for files that failed to print [+][-]
Values (value in bold is default):
none, copy, move, delete
Specifies a folder where failed files should be moved or copied.
Example:
failed_name: Customize filename template for files that failed to print [+][-]
Values:
{*SrcFileName}.{*SrcFileExt}
Allows to adjust the filename for the source files that failed to print.
Learn more →
Example:
failed_delsf: Delete empty subfolders [+][-]
Values:
no (default value), yes
Deletes empty subfolders after failed files were moved or deleted from there.
Example:
Command line example:
File loading settings (-fls)
This switch controls which parameters should be used "on input", meaning it determines which parameters should be loaded when processing certain file types.
-fls html
width: Set page width for HTML files [+][-]
Default value: 0
Sets custom page width for source HTML files.
Example:
2Printer.exe -src "C:\In\*.*" -prn "MFP LaserJet" -fls html width:500 height:300
height: Set page height for HTML files [+][-]
Default value: 0
Sets custom page height for source HTML files.
Example:
2Printer.exe -src "C:\In\*.*" -prn "MFP LaserJet" -fls html width:500 height:300
units: Select units for setting width and height [+][-]
Values:
inch (default value), mm, cm
Switch between inches, millimeters, and centimeters to specify the page size of source HTML files.
Example:
2Printer.exe -src "C:\In\*.*" -prn "MFP LaserJet" -fls html width:500 height:300 units:mm
Statistics (-stat)
The -stat switch creates a report in XML format with printing statistics, such as the types of printed documents and the number of printed pages.
-stat
report_folder: Set path to a folder for saving reports [+][-]
Sets path to a folder for saving the report (an XML file).
Example:
2Printer.exe -src "C:\In\*.*" -prn "MFP LaserJet" -stat report_folder:"C:\2Printer reports"
Operations (-oper)
Add the -oper switch to use additional operations on files before printing them. These are: adding an image watermark, adding a text watermark, resizing, cropping, and rotating.
-oper watermark
pages: Set page range for watermark [+][-]
Default value: all
Sets pages where the watermark should be applied. Example: "1,3-5,12". By default, it is applied to all pages.
To select pages from the end of the document, use the expression "last" (last for the last page, last1 for the penultimate page, etc.). For example: 1,5,last2,last1,last
Example:
2Printer.exe -src "C:\In\*.*" -prn "MFP LaserJet" -oper watermark image:"C:\Watermark.png" pages:"1,2"
image: Set path to image watermark [+][-]
Sets path to the file to be used as a watermark. Example: "C:\Watermark.png"
Example:
halign: Set horizontal alignment for image watermark [+][-]
Values:
left (default value), center, right
Aligns image watermark horizontally: to the left, center, or right side of a sheet. Can be combined with other alignment and offset parameters.
Example:
valign: Set vertical alignment for image watermark [+][-]
Values:
top (default value), center, bottom
Aligns image watermark vertically: to the left, center, or right side of a sheet. Can be combined with other alignment and offset parameters.
Example:
offx: Set horizontal offset (% of page width) [+][-]
Default value: 0
Shifts the pages' position horizontally using a specific value (in percent of the page width). Can be combined with other alignment and offset parameters.
Example:
offy: Set vertical offset (% of page height) [+][-]
Default value: 0
Shifts the pages' position vertically using a specific value (in percent of the page width). Can be combined with other alignment and offset parameters.
Example:
size: Set watermark size (% of page width and height) [+][-]
Default value: -1 (original size)
Sets watermark size as percent of source file's page height and width. For example, enter size:15 for 15%. -1 is the default value, which applies the watermark "as is" using its original size.
Example:
angle: Set watermark rotation angle [+][-]
Default value: 0
Rotates the watermark at a specific angle. The rotation is clockwise by default, but you can switch it to counterclockwise.
Example:
direction: Select direction for watermark rotation: CW or CCW [+][-]
Values:
cw (default value), ccw
You can select clockwise (cw) or counterclockwise (ccw) direction for watermark rotation.
Example:
method: Use a certain blending method when watermarking [+][-]
Values:
alphablend (default value), overdraw
Uses a blending method when applying a watermark – AlphaBlend or Overdraw.
Example:
zorder: Set Z-order for image watermark application [+][-]
Values:
foreground (default value), background
Places the watermark behind (background) or in front (foreground) of the document's contents.
Example:
-oper textwatermark
text: Enter watermark text [+][-]
You can input any text within double quotation marks.
Example:
font: Select font [+][-]
Default value: Arial
Applies a specific font for text watermark.
Example:
fontsize: Set font size [+][-]
Default value: 12
Sets font size value (in points or percents) for text watermark.
Example:
fs_units: Select font size units: points or percents [+][-]
Values:
points (default value), percents
Switches between points and percent (percent of image height) when specifying font size.
Example:
bold: Make font bold [+][-]
Values:
no (default value), yes
Uses a bold font style for the text watermark.
Example:
italic: Make font italic [+][-]
Values:
no (default value), yes
Uses an italic font style for the text watermark.
Example:
underline: Make font underlined [+][-]
Values:
no (default value), yes
Uses an underline font style for the text watermark.
Example:
halign: Set horizontal alignment for text watermark [+][-]
Values:
left (default value), center, right
Aligns text watermark horizontally: to the left, center, or right side of a sheet. Can be combined with other alignment and offset parameters.
Example:
valign: Set vertical alignment for text watermark [+][-]
Values:
top (default value), center, right
Aligns text watermark vertically: to the top, center, or bottom of a sheet. Can be combined with other alignment and offset parameters.
Example:
offx: Set horizontal offset for text watermark [+][-]
Default value: 0
Shifts the watermark's position horizontally using a specific value (in percent of the page width). Can be combined with other alignment and offset parameters.
Example:
offy: Set vertical offset for text watermark [+][-]
Default value: 0
Shifts the watermark's position vertically using a specific value (in percent of the page height). Can be combined with other alignment and offset parameters.
Example:
color: Set text color for text watermark [+][-]
Default value: "r:0,g:0,b:0,a:255"
Applies text color using RGBA color model –
"r:(0-255),g:(0-255),b:(0-255);a:(0-255)".
Example:
bgcolor: Set text background color for text watermark [+][-]
Default value: "r:255,g:255,b:255,a:255"
Applies color behind the text using RGBA color model –
"r:(0-255),g:(0-255),b:(0-255);a:(0-255)".
Example:
angle: Set text watermark rotation angle [+][-]
Default value: 0
Rotates the text watermark at a specific angle. You can select any arbitrary angle.
Example:
direction: Select direction of rotation for text watermark: CW or CCW [+][-]
Values:
cw (default value), ccw
Sets direction for text watermark rotation – clockwise (cw) or counterclockwise (ccw).
Example:
border: Draw border around text watermark [+][-]
Values:
no (default value), yes
Adds a border around the text watermark.
Example:
zorder: Set Z-order for text watermark application [+][-]
Values:
foreground (default value), background
Places the watermark behind (background) or in front (foreground) of the document's contents (positioning by Z-axis).
Example:
-oper resize
pages: Set page range for resize operation [+][-]
Default value: all
Defines the range of pages which must be resized, e.g., pages:1,3,5-12. If not specified, resizing is applied to every page.
To select pages from the end of the document, use the expression "last" (last for the last page, last1 for the penultimate page, etc.). For example: 1,5,last2,last1,last
Example:
size: Set new size of images or pages (width and height) [+][-]
Default value: "0 0"
Defines width and height dimensions (in pixels) for file resizing. The source file proportions are kept.
Example:
units: Select units for setting resize values [+][-]
Values:
pixels (default value), percents
Uses pixels or percents as units for resize operation.
Example:
fmode: Select Fit mode [+][-]
Values:
fit_in_size (default value), thumbnail, fit_width, fit_height, fill_in_size, none
Applies page scaling to fit a specific size. Available values:
- fit_in_size – Fit the size specified for the size: parameter. Oversized images will be shrunk to the defined width and height, and small ones will be enlarged to fit the page size;
- thumbnail – Fit the size of a thumbnail;
- fill_in_size – Fill the size specified for the size: parameter. The image will be positioned on the entire sheet by the smaller side (the longer side may go beyond the defined area);
- fit_width – Fit the size specified for the size: parameter by width;
- fit_height – Fit the size specified for the size: parameter by height.
Example:
falign: Select Fit alignment [+][-]
Values:
center (default value), left_top, right_bottom
Aligns the resized image to the center, left top corner, or right bottom corner.
Example:
nozoom: Disable making image larger than original size [+][-]
Values:
no (default value), yes
Prevents image upscaling to avoid quality loss.
Example:
method: Select image resampling method [+][-]
Values:
bilinear (default value), neighbour
Applies the nearest neighbor or bilinear interpolation resampling method for image resizing.
Example:
color: Fill blank margins around the resized image with color [+][-]
Default value: "r:255,g:255,b:255,a:255"
Fills blank margins around the resized image (if they appear) with a certain color using RGBA color model – "r:(0-255),g:(0-255),b:(0-255);a:(0-255)".
Example:
-oper crop
pages: Set page range for crop operation [+][-]
Default value: all
Defines the range of pages which must be cropped, e.g., pages:1,3,5-12. If not specified, the operation is applied to every page.
To select pages from the end of the document, use the expression "last" (last for the last page, last1 for the penultimate page, etc.). For example: 1,5,last2,last1,last
Example:
2Printer.exe -src "C:\In\*.*" -prn "MFP LaserJet" -oper crop pages:"1,3,5-10" method:autocrop
method: Select method of image cropping [+][-]
Values:
margins (default value), rect2p, rect_pwh, autocrop
Applies a specific image cropping method.
Example:
left: Set left margin value [+][-]
Default value: "0"
Sets the left margin, in pixels. Applies to margins and rect2p crop methods.
Example:
top: Set top margin value [+][-]
Default value: "0"
Sets the top margin, in pixels. Applies to margins and rect2p crop methods.
Example:
right: Set right margin value [+][-]
Default value: "0"
Sets the right margin, in pixels. Applies to margins and rect2p crop methods.
Example:
bottom: Set bottom margin value [+][-]
Default value: "0"
Sets the bottom margin, in pixels. Applies to margins and rect2p crop methods.
Example:
width: Set width of cropping rectangle for rect_pwh method [+][-]
Default value: "0"
Sets the crop width for the rect_pwh crop method, in pixels.
Example:
height: Set height of cropping rectangle for rect_pwh method [+][-]
Default value: "0"
Sets the crop height for rect_pwh cropping method, in pixels.
Example:
color: Set color sample for autocrop method [+][-]
Default value: "r:255,g:255,b:255,a:255"
Applies color code for the autocrop method using RGBA color model –
"r:(0-255),g:(0-255),b:(0-255);a:(0-255)".
Example:
tolerance: Set tolerance value for autocrop method [+][-]
Default value: "0"
Applies tolerance value for autocrop method (0-100%). Tolerance parameter specifies the allowed deviation from the color sample specified in the previous color parameter.
Example:
units: Set the unit of measurement for the Crop operation [+][-]
Default value: percents
Specifies the measurement units used for the Crop operation: pixels, millimeters (mm), centimeters (cm), or percentages.
Example:
-oper rotate
pages: Set page range for rotate operation [+][-]
Default value: all
Defines the range of pages which must be rotated, e.g., pages:1,3,5-12. If not specified, rotation is applied to every page.
To select pages from the end of the document, use the expression "last" (last for the last page, last1 for the penultimate page, etc.). For example: 1,5,last2,last1,last
Example:
angle: Define the angle of image rotation [+][-]
Default value: 0
Rotates the document or image to a certain degree (0-360°). The rotation is clockwise by default.
Example:
direction: Select direction for rotation: CW or CCW [+][-]
Values:
cw (default value), ccw
You can select clockwise (cw) or counterclockwise (ccw) direction for pages' or images' rotation.
Example:
color: Fill blank margins around the rotated image with color [+][-]
Default value: "r:255,g:255,b:255,a:255"
Fills blank margins around the rotated image (if they appear) with a certain color using RGBA color model – "r:(0-255),g:(0-255),b:(0-255);a:(0-255)".
Example:
-oper barcode
pages: Set page range for the Barcode operation [+][-]
Default value: all
Sets pages where the barcode should be applied. Example: "1,3-5,12". By default, it is applied to all pages.
To select pages from the end of the document, use the expression "last" (last for the last page, last1 for the penultimate page, etc.). For example: 1,5,last2,last1,last
Example:
contents: Enter barcode textual contents or code [+][-]
Default value: none
Enter the barcode code or text for it. For example, if you're adding a QR code, simply enter your text (or a hyperlink) here.
Example:
format: Specify barcode format [+][-]
Default value: none
You can apply various types of barcodes, including QR Code, Code 128, EAN, UPC, Data Matrix, and others.
The full list of supported barcode types includes:
code_128, aztec, codabar, code_39, code_93, data_matrix, ean_8, ean_13, itf, maxicode, pdf_417, qr_code, rss_14, rss_expanded, upc_a, upc_e, all_1d, upc_ean_extension, msi, plessey, imb, and pharma_code.
Example:
font: Select font for the Barcode operation [+][-]
Default value: Arial
If the barcode displays text, you can choose a font for the Barcode operation. Any font installed on your Windows system can be used.
Example:
fontsize: Set size of the font for the Barcode operation [+][-]
Default value: 5
Set the font size for the Barcode operation as a percentage (%) of the barcode height.
Example:
bold: Apply bold styling for the font [+][-]
Default value: no
Makes font for the barcode semi-bold.
Example:
italic: Apply italic styling for the font [+][-]
Default value: no
Makes font for the barcode italic.
Example:
underline: Make font underlined [+][-]
Default value: no
Makes font for the barcode underlined.
Example:
gs1: Createa and apply GS1-compliant barcode [+][-]
Default value: no
GS1 barcodes are standardized barcode formats that encode product identifiers, such as the Global Trade Item Number (GTIN). They ensure global uniqueness and interoperability, so products can be scanned and identified consistently across retailers, warehouses, and countries.
Example:
show_text: Show or hide barcode text [+][-]
Default value: yes
Show or hide barcode textual contents on the output.
Example:
size: Adjust barcode size relative to the page’s width and height (%) [+][-]
Default value: 20
Set the barcode size as a percentage of the page's width and height.
Example:
aspx: Set the width-to-height ratio of the barcode along the X-axis (width) [+][-]
Default value: 300
Set the width-to-height ratio of the barcode along the X-axis (width). Use together with the aspy parameter.
Example:
aspy: Set the width-to-height ratio of the barcode along the Y-axis (height) [+][-]
Default value: 300
Set the width-to-height ratio of the barcode along the Y-axis (height). Use together with the aspx parameter.
Example:
halign: Set horizontal alignment for barcode [+][-]
Default value: left
Aligns the barcode horizontally: to the left, center, or right side of a sheet. Can be combined with other alignment and offset parameters. Use together with the valign parameter.
Example:
valign: Set vertical alignment for barcode [+][-]
Default value: top
Aligns the barcode vertically: to the top, center, or bottom of a sheet. Can be combined with other alignment and offset parameters. Use together with the 'halign' parameter.
Example:
offx: Set horizontal offset value for barcode (percent of the page width) [+][-]
Default value: 0
Sets the horizontal offset for the barcode as a percentage of the page width. This shifts the barcode’s position along the X-axis. Can be used together with alignment settings and the 'offy' parameter for precise placement.
Example:
offy: Set vertical offset value for barcode (percent of the page height) [+][-]
Default value: 0
Set the vertical offset for the barcode as a percentage of the page height. This moves the barcode along the Y-axis. Can be used with alignment settings and the 'offx' parameter for accurate positioning.
Example:
color: Define text color for barcode [+][-]
Default value: "r:0,g:0,b:0,a:255"
Applies text color using RGBA color model –
"r:(0-255),g:(0-255),b:(0-255);a:(0-255)".
Example:
bgcolor: Define text color for barcode [+][-]
Default value: "r:255,g:255,b:255,a:255"
Applies text color using RGBA color model –
"r:(0-255),g:(0-255),b:(0-255);a:(0-255)".
Example:
border: Draw border around the barcode [+][-]
Default value: "r:255,g:255,b:255,a:255"
Adds a border around the barcode.
Example:
Command lines (-cmdlines)
The -cmdlines switch allows you to set the path to a TXT file that contains the command (or multiple commands) that need to be executed. This can be helpful when the command is very long or if you want to run several commands sequentially. Importantly, this switch enables you to print to multiple printers simultaneously.
Example:
2Printer.exe -cmdlines "C:\Folder\commands.txt"

2Printer Default Settings
If you don't want to define new print settings in the command line each time, take a look at the default settings of the program – 2Printer Settings panel with GUI controls. From there, you can configure everything only once. To access it, execute this command:
2printer.exe -ini
![]() How to configure 2Printer Settings
How to configure 2Printer Settings
The use of command lines makes 2Printer very adaptive to your printing needs. You can combine or modify the command line switches, parameters, and values mentioned above the way you wish – they don’t require strict order. If you have any difficulty setting up your workflows with 2Printer, please let us help you!